Scanner Capture Guidelines

Here is a detailed guide on how to capture calibrated fabric samples using the EPSON Scan 2 software for the Epson Perfection V600 and V850 scanners.
This article provides a detailed guide to installing, configuring, and scanning your textiles for digitization. Following these recommendations will avoid any automatic image processing that could alter the digital fabric's appearance.
Note that these instructions have been written for the Epson Perfection v600 and v850 scanners.
1. Install
First, install the EPSON Scan 2 proprietary software to control the scanning device.
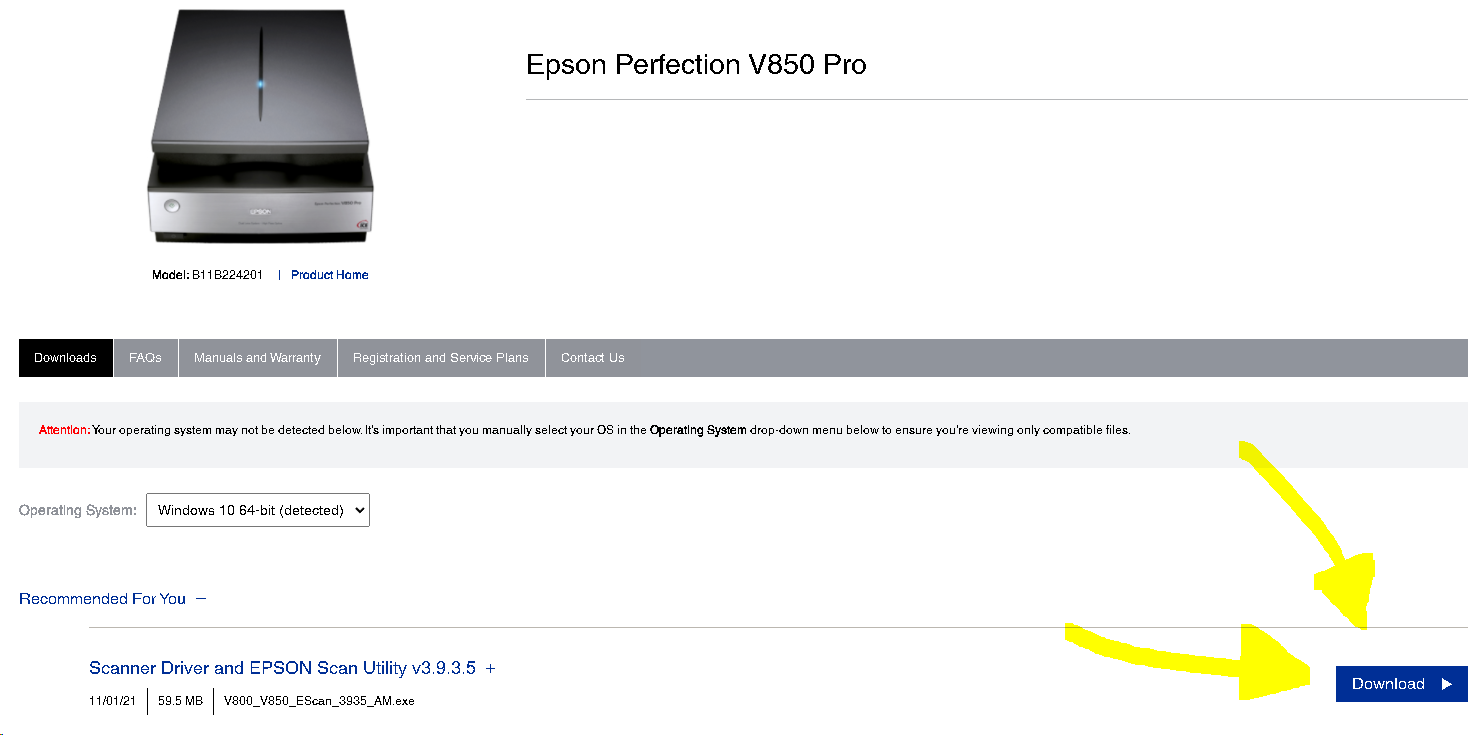
Go to:
Download the latest Scanner Driver and EPSON Scan Utility version.
Run the downloaded executable file and follow the instructions provided to install the software.
Plug the scanner into your computer and launch the EPSON Scan software. If the device is not recognized, restart your computer and try again.
2. Configure
Open EPSON Scan software.
Check that the following parameters are properly set:
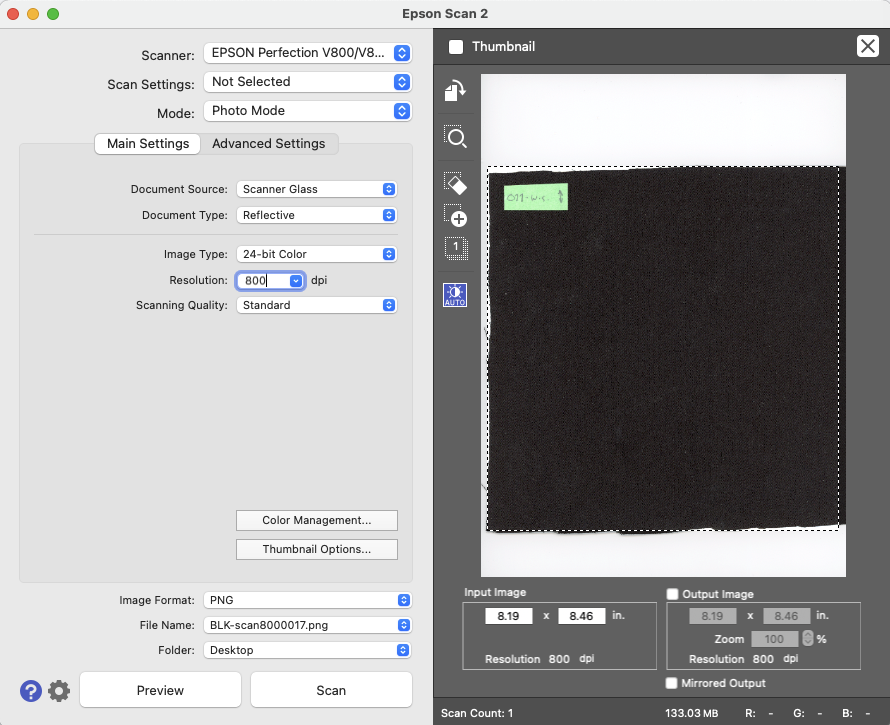
Epson Scan 2:
Scanner: Epson Perfection V850 (Or V600)
Scan Settings: Not Selected
Mode: Photo Mode
Main Settings:
Document Source: Scanner Glass (not Slide Attachment)
Document Type: Reflective
Image Type: 24-bit Color
Scanning Quality: Standard
ADVANCED SETTINGS:
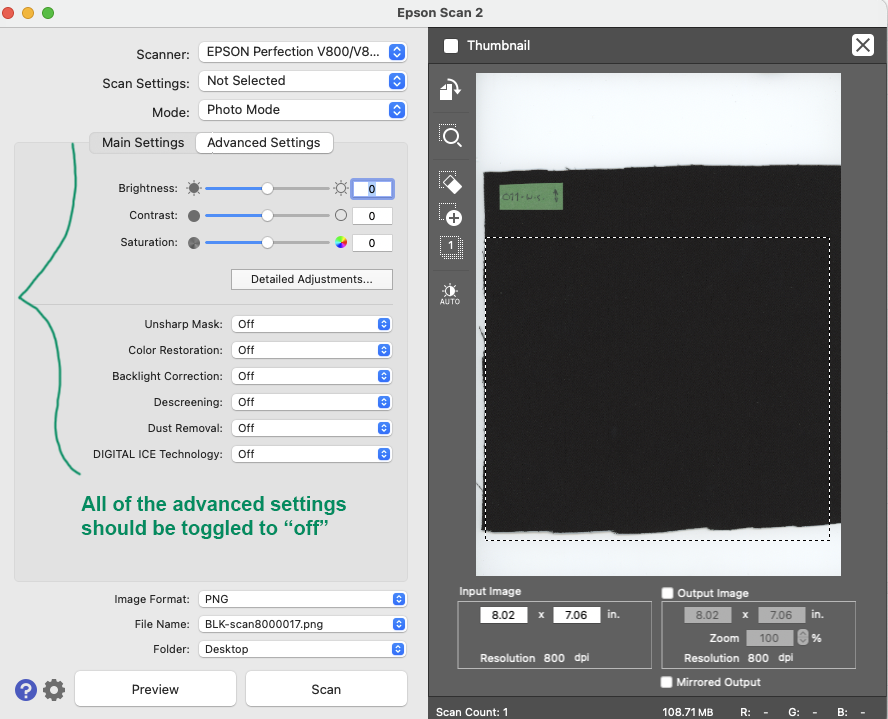
Avoid any post-processing scanning option:
Once you have double-checked that your settings match the image above, go to the Configuration window and select the Color tab.
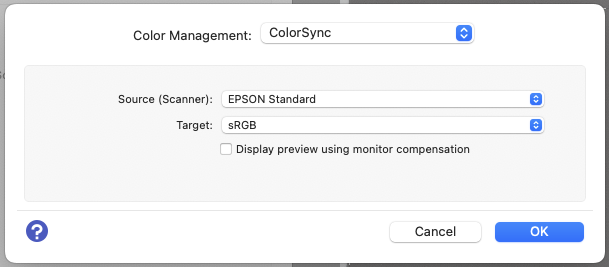
Select Color Control and disable the Continuous auto exposure option.
Select ICM and check that EPSON Standard is selected as the Source (scanner).
Your Configuration>Color tab should look like the following screenshot. Click OK.
3. Scan
Now that all of the automatic processes have been disabled and the color profile has been selected, you can proceed and scan your sample.
Place your fabric on the scanner glass. Be sure that the sample is properly aligned and that there are no wrinkles or dust.
Click on Preview and select the area and resolution you want to capture.
Making sure that your material is scanned correctly will save you time and streamline your tiling process.
Click on Scan.
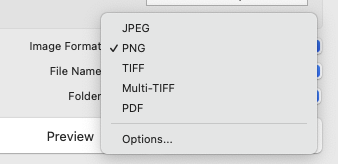
File: Save Settings window will pop up. Here you can select the image format in which the resulting scan will be stored.
We recommend using PNG or TiFF to avoid information loss during the encoding stage.
Click OK and your sample will be scanned.
Textura supports both PNG and TIFF formats for uploads. However, PNG files load faster in Textura’s real-time initial upload view. To ensure the best experience, we highly recommend scanning or converting your files to PNG format.