Import a .zip File From SEDDI Textura Into CLO 3D

This article explains how to import a digital textile created in SEDDI Textura into CLO 3D using a .zip file.
With SEDDI Textura, it is possible to export your digital materials in different formats dependent on the 3D tools you are using. If you are designing with CLO 3D, there are several formats you can use to import your digital textiles.
This article explains how to import your digital textile from SEDDI Textura into CLO 3D using a .zip file.
What You Need to Know
With SEDDI Textura you can generate texture maps and/or physical parameters for CLO 3D.
Regardless of the format you download from SEDDI Textura, the final result in CLO 3D should be the same. It is important to consider that each render engine plus the scene details (environment, illumination, etc.) can change the appearance of a digital textile.
SEDDI Textura generates several file formats you can import into CLO 3D: .zip, .sbsar, and .gltf. You can find more information about .sbsar and .gltf at the end of this article.
Importing a .zip file in CLO requires manually adding the maps plus the physics properties in the fabric panel in CLO 3D.
Download Your Digital Textile as a .zip File
There are two ways you can download a digital material from SEDDI Textura. One is hovering over the material in the library and clicking on the download icon. This will display a series of formats you can choose from to start the download. In this case, we would select a .zip file.
The other is opening the material viewer and clicking "Download". This will also show the available formats to download. You can download as many formats as required.

Import the .zip File Into CLO 3D
Once the download is finished, extract the ZIP file into the desired folder. When extracting, a new folder and a .txt file will appear.
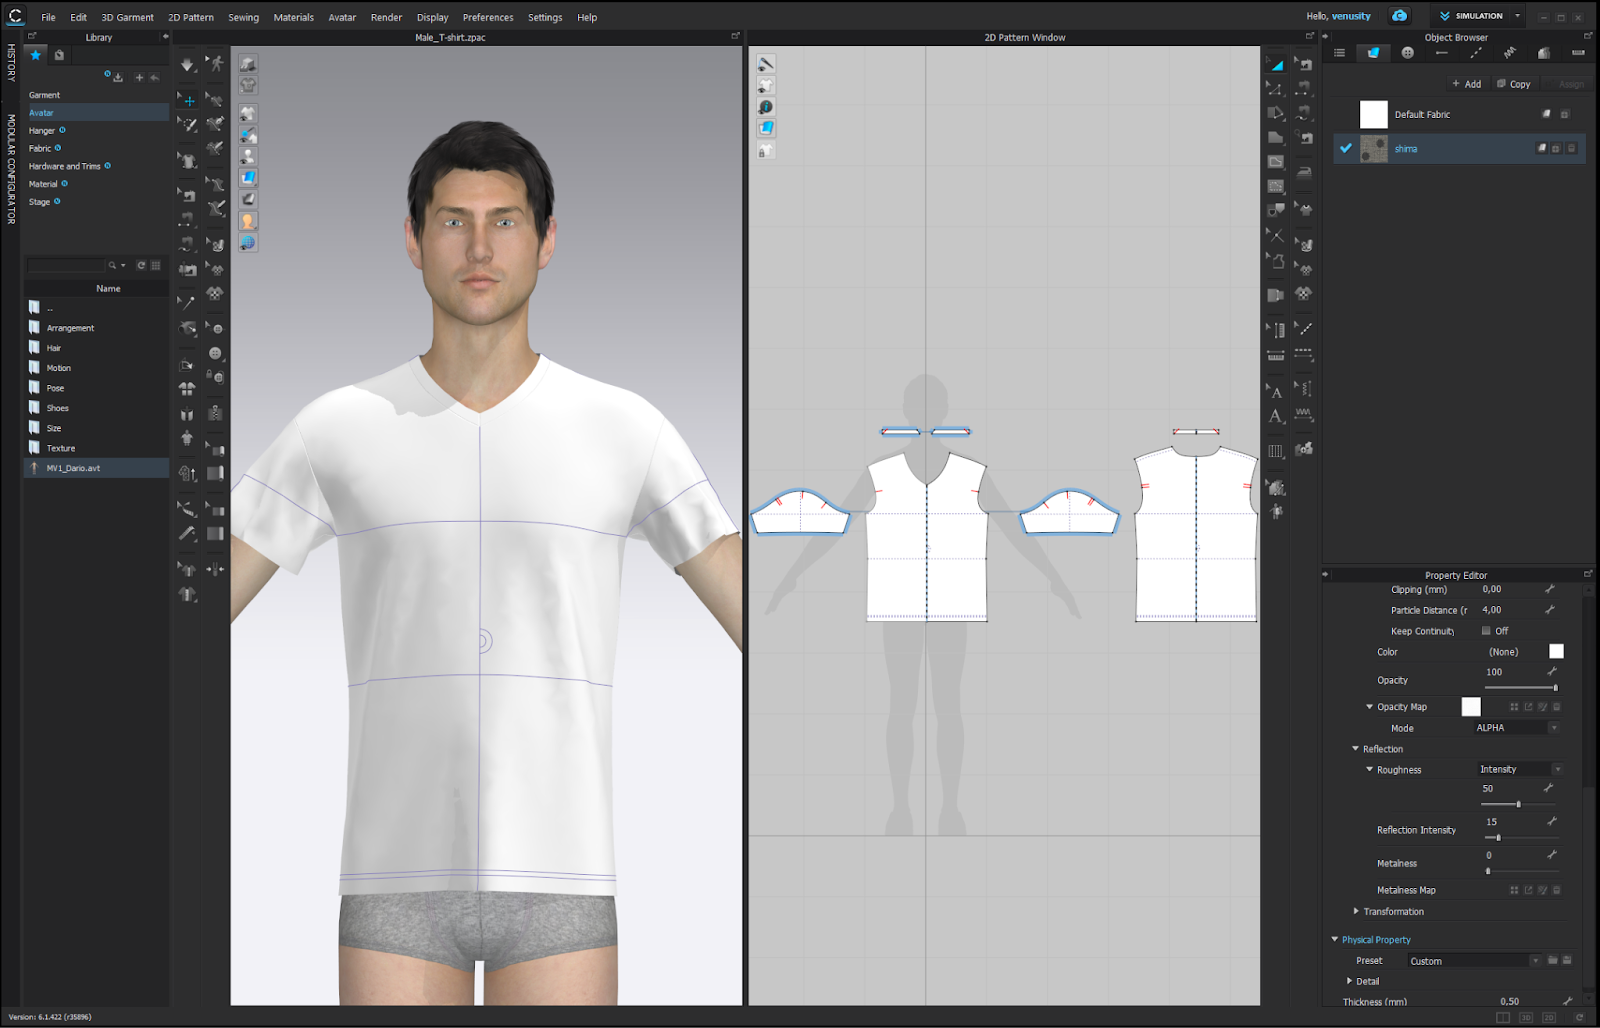
Open your project in CLO, and create a new fabric by clicking “add” in the right corner of the screen as shown here:

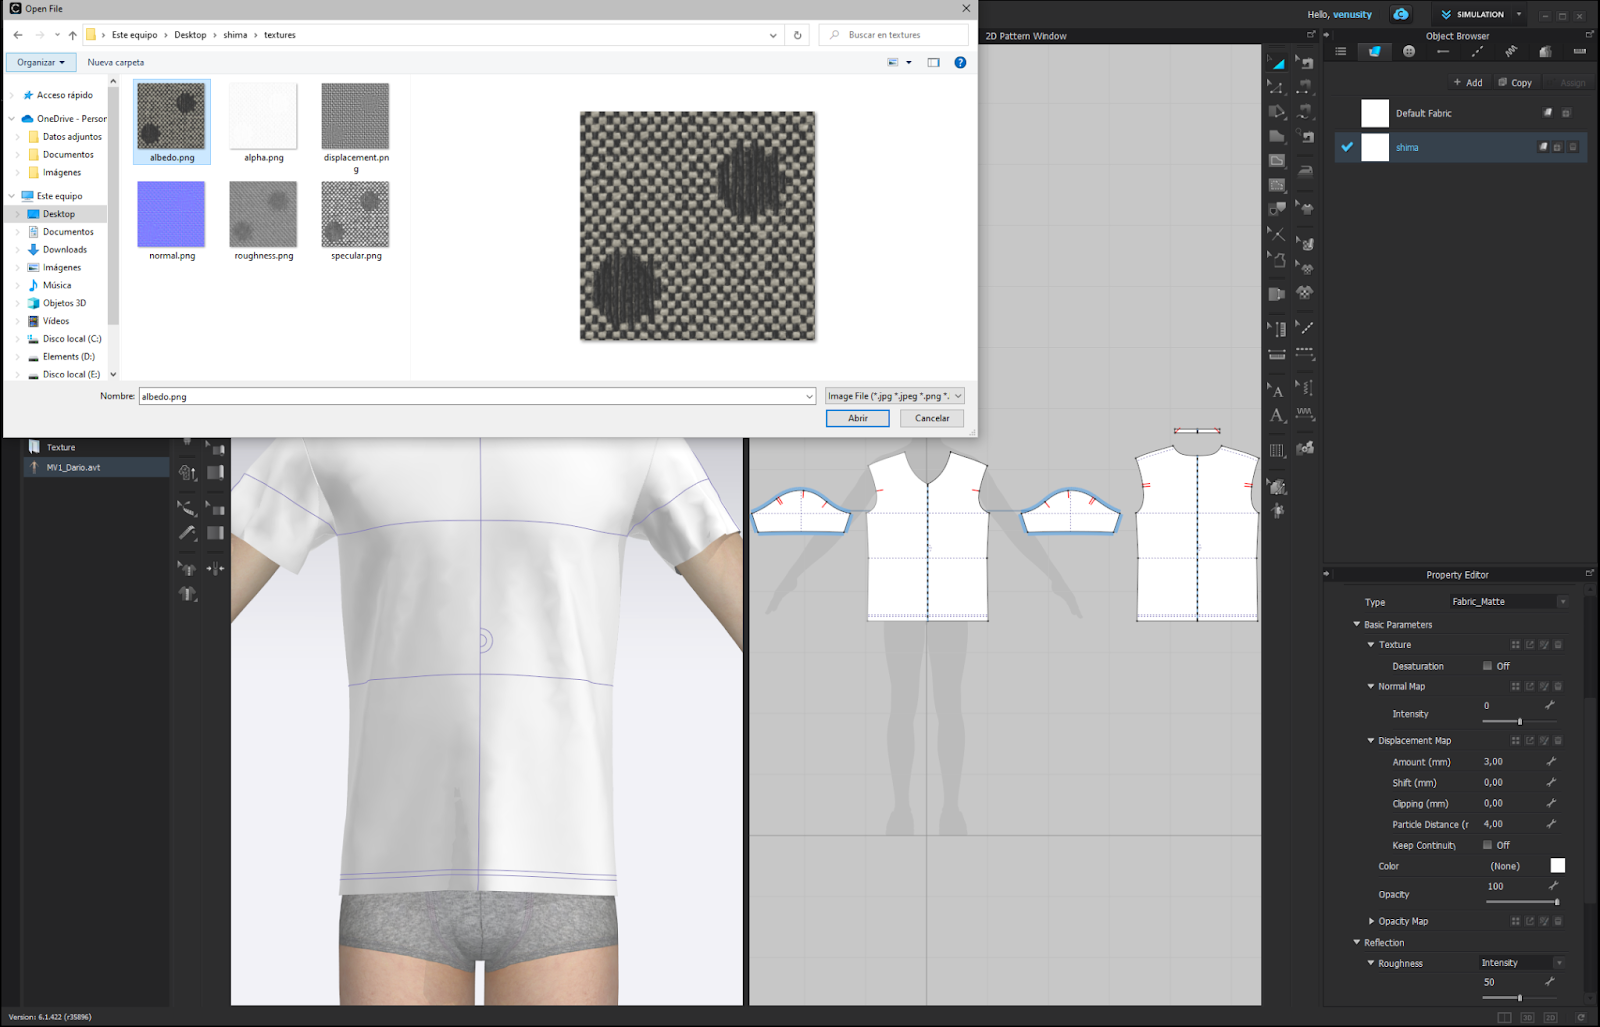
Click on the fabric to select it and go to the property editor. Once there, click the button with four squares on the right side of the “Texture” parameter. A new window will appear. Search the “textures” folder and select “Albedo”. Be sure to check the texture size (width/height) to ensure the right scale. This information is available in SEDDI Textura or in the .txt file contained in the folder you downloaded.

Repeat this process for the “Normal” and “Displacement” maps. You will need to input the displacement 'amount' in mm.
We recommend you to input half of your material's thickness for this value (e.g if your material is 0.4mm thick, input 0.2mm as the displacement value).
In order to import the Opacity map, go to the "Opacity" parameter in the property editor. Repeat the same process as before, by clicking on the button with four squares and selecting “alpha.png”.
Click on the arrow next to “Opacity” to expand the properties and change “RGB” to “Alpha”.
To import Roughness, go to “Reflection” in the properties editor. Expand it to see the roughness parameter. Change “Intensity” to “Map” and expand it (clicking the arrow as was done with the Alpha). The button with four squares will appear; navigate to the extracted folder (Textures) and select “roughness.png”.
How to Add Physical Properties to Your Digital Textile in CLO
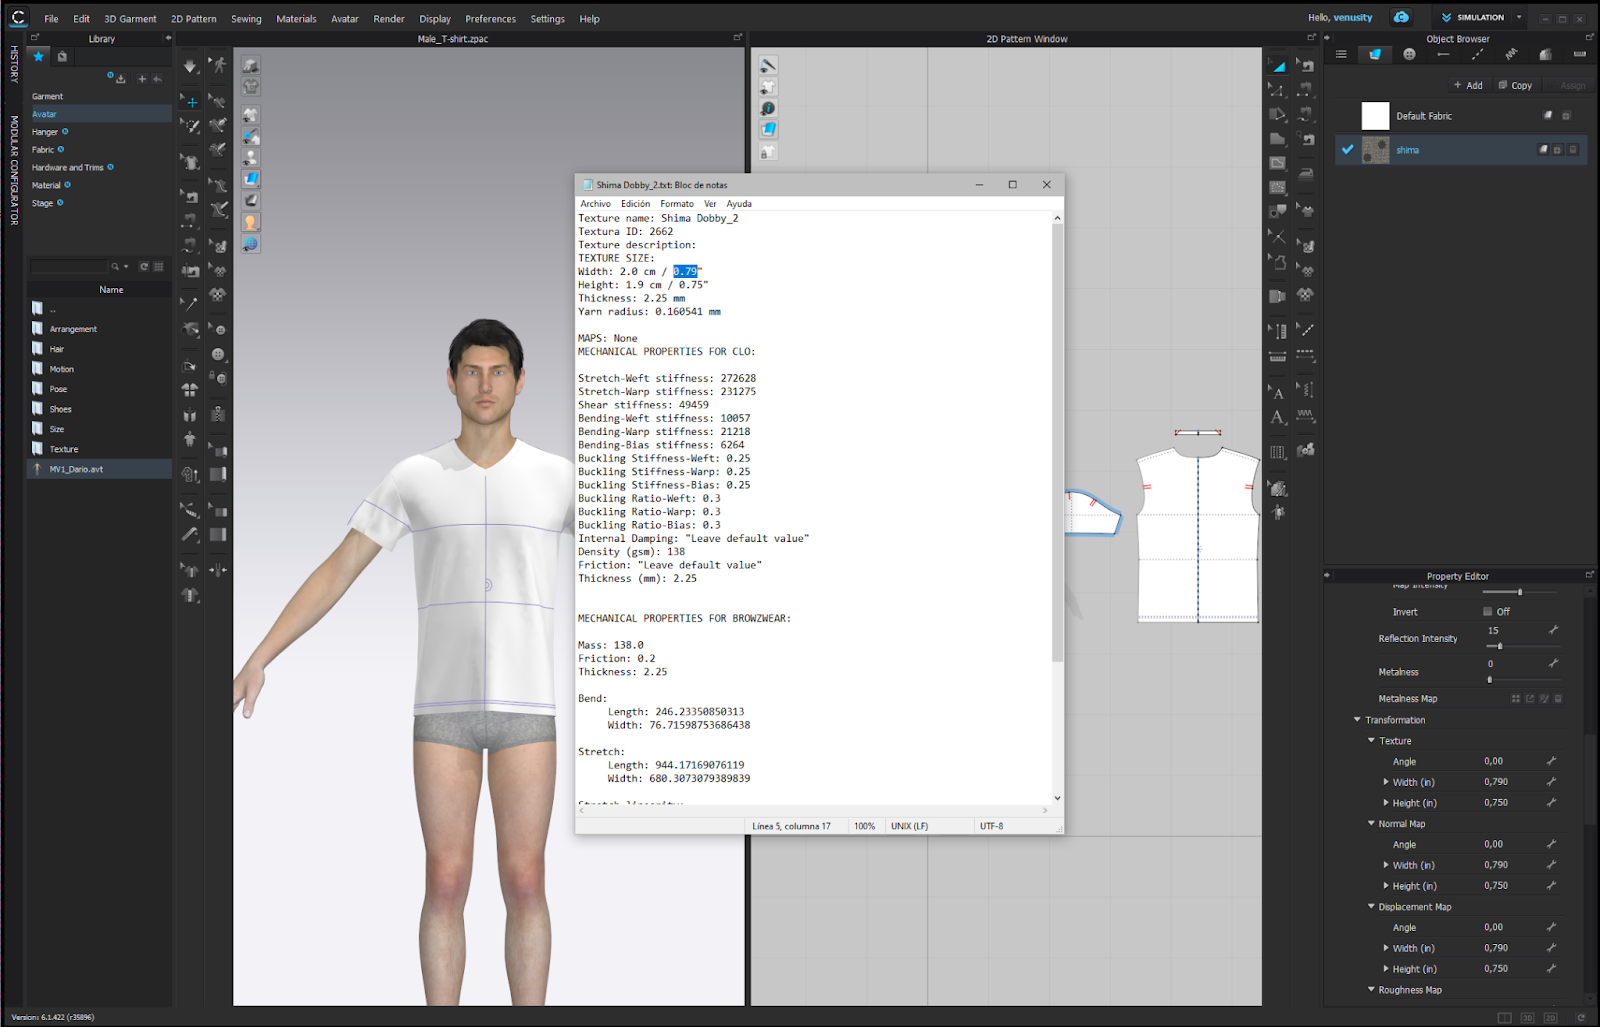
If you generated your digital fabric with physical properties in SEDDI Textura and downloaded it in the .zip format, you will find a .txt file in the folder. This file contains the mechanical data and other details about your digital textile. To add these properties in CLO, you will need to copy and paste the parameters from SEDDI Textura into CLO. Here is how.
Copy Mechanical Data From SEDDI Textura
To add the mechanical information of your digital textile to CLO, you can:
1) Copy the parameters directly from SEDDI Textura and paste them in the properties panel in CLO.

2) Copy the parameters from the .txt file and paste them into CLO.
The parameters are the same, so the result will be the same, regardless of your process.
Paste the Physical Properties of Your Digital Textile Into CLO 3D
In CLO under the “Transformation” section, you will find another category called “Physical Properties”. Expand it, and another parameter called “Details” will appear. Once more, expand it and several values will appear (stretch, shear, bending…etc.).
Expand each one, making visible another value (the one you need to replace).
Go to the .txt file or your digital fabric in SEDDI Textura to find all of the parameters. Copy each one to the corresponding parameter in CLO.
Note: it is possible that some of the fields will not initially be visible, and you'll need to expand the options by clicking on the toggle next to each property.

Optional Step:
Including the yarn radius in the displacement map parameters will enhance the accuracy of your fabric's yarn volume.
you will be able to find that information on the U3M file downloaded via the Textura zip or GLTF format
For Example: ![]()
Now that you have your fabric correctly imported to CLO, simply drag it into the appropriate pieces of the garment, and simulate it.
If you are interested to learn how to import digital fabrics into CLO 3D in other formats, please check out the following articles: